Delete Smart DNS Proxy Instantly
Smart DNS Proxy causes following error 0x8024DFFF WU_E_SETUP_UNEXPECTED Windows Update Agent could not be updated because of an error not covered by another WU_E_SETUP_* error code. , 0x80244005 WU_E_PT_SOAPCLIENT_SEND Same as SOAPCLIENT_SEND_ERROR - SOAP client failed to send a message for reasons of WU_E_WINHTTP_* error codes., 0xf0813 CBS_E_INVALID_INSTALL_STATE install state value not acceptable, 0x00000034, 0x8024EFFF WU_E_EE_UNEXPECTED There was an expression evaluator error not covered by another WU_E_EE_* error code., 0x00000059, Error 0x80240031, 0x0000000C, 0x80248006 WU_E_DS_BADVERSION The current and expected versions of the data store do not match., 0x00000005, 0x00000043, Error 0xC000021A, 0x80244001 WU_E_PT_SOAPCLIENT_INITIALIZE Same as SOAPCLIENT_INITIALIZE_ERROR - initialization of the SOAP client failed, possibly because of an MSXML installation failure., 0x80240025 WU_E_USER_ACCESS_DISABLED Group Policy settings prevented access to Windows Update., 0x00000035, 0x8024E004 WU_E_EE_INVALID_VERSION An expression evaluator operation could not be completed because the version of the serialized expression data is invalid.Detail About Smart DNS Proxy With Abolish Steps
Basic Knowledge Of Smart DNS Proxy
Smart DNS Proxy is suspected as extremely hazardous Operating System virus which spread in the Operating System secretly and performs malicious functionality to make the Operating System compromised. It poses harmful impacts on the Operating System behavior and tries to take full control over the Operating System by modifying the default settings. It is designed by cyber criminals which helps them by transferring your confidential and financial information. They can give you big loss and make you suffer from identity theft situation. It is responsible for weaken the Operating System performance and modifies registry entries with malicious payloads. It also interrupts your surfing session by displaying unwanted advertisements and also blocks your visit to your favorite sites. You will also experience some change of default homepage browser and desktop background simultaneously. So if you notice its notorious consequences then Abolish it immediately without delay any more.

Guide: 1 Remove Smart DNS Proxy From Registry Editor
Guide: 2 Remove Smart DNS Proxy From Control Panel
Guide: 3 Start Your Computer In Safe Mode With Networking
Guide: 4 Remove Smart DNS Proxy Related Process From Task Manager
Guide: 5 Remove Smart DNS Proxy From Browsers
Guide: 1 Remove Smart DNS Proxy From Registry Editor
- Step 1: Open Run Window By Pressing the key Win+R.

- Step 2: Type regedit and enter OK.
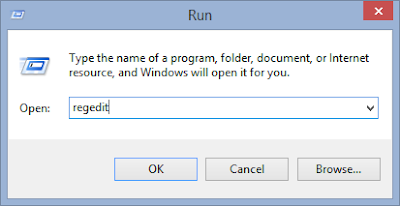
- Step 3: Find & Remove all Registry files related to Smart DNS Proxy.
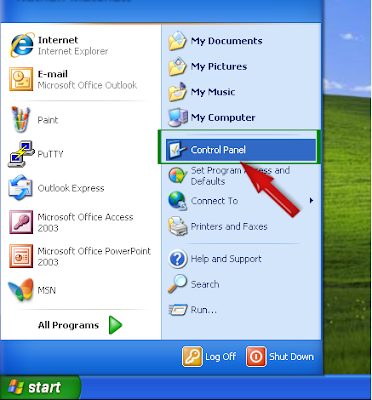
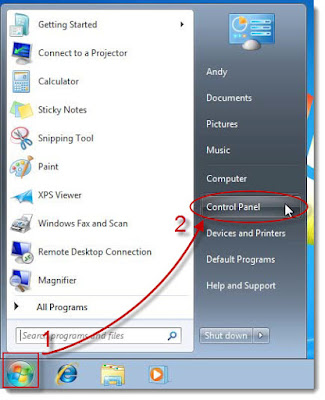
- Step 1: Go Start menu and select Control panel.
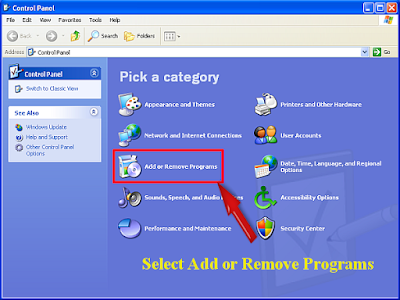
- Step 2: Select Add or Abolish program option.
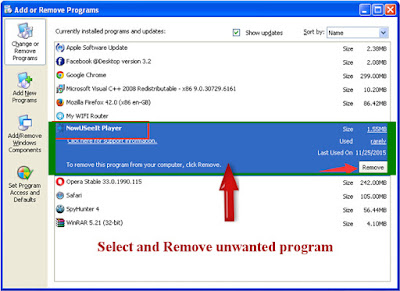
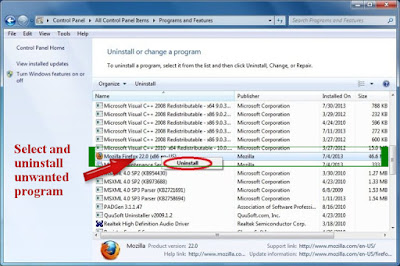
- Step 3: Search & Select unwanted program whom you wanted to Abolish from Operating System.
- Step 4: Click on Remove Button.
- Step 1: Click on Windows Key from your keyboard.

- Step 2: Select Control panel Option From start menu.
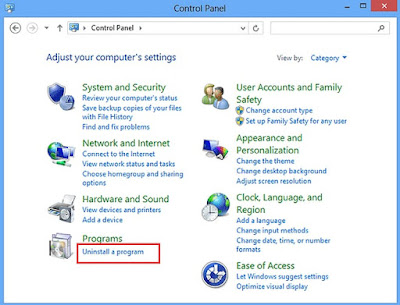
- Step 3: Select Abolish a Program option from Program menu.

- Step 4: Select Unwanted programs from your Operating System whom you want to Abolish.
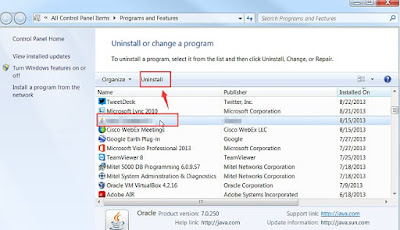
- Step 1: Press Win+R button to Open Run Box Command Window.

- Step 2: Type Control panel in Run Window and Press Enter.
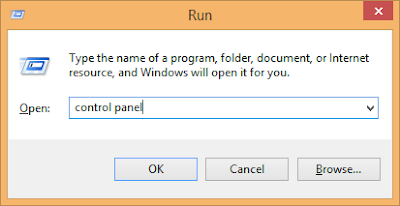
- Step 3: Click on Remove a program.
- Step 4: Select Smart DNS Proxy and other malicious program whom you want to Abolish and then Click Remove.
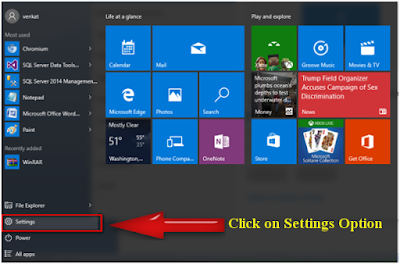
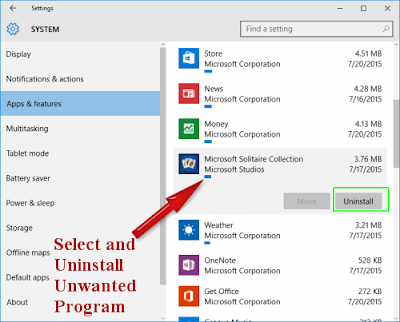
- Step 1: Press Start button and Choose Setting option.
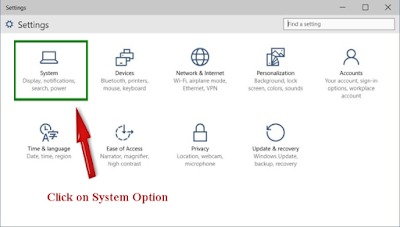
- Step 2: Select Operating System option.
- Step 3: Click on Apps and Features option.
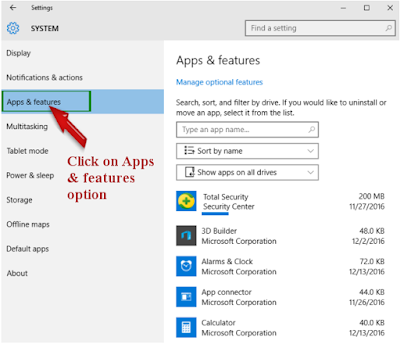
- Step 4: Select Smart DNS Proxy or suspicious programs whom you want to Abolish and Click Remove.
Abolish Smart DNS Proxy From Windows XP/Vista
- Step 1: Restart your Operating System.
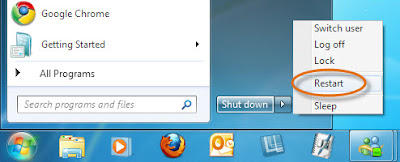
- Step 2: Press F8 Key to open Advance Boot Option Window.

- Step 3: Opened Advance Boot Option.
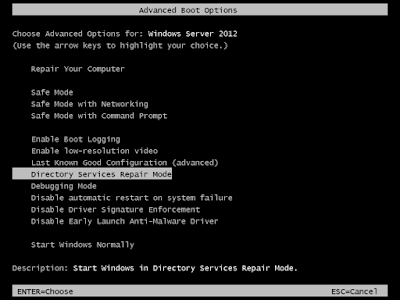
- Step 4: Select “Safe Mode with Networking” option then hit Enter button from keyword.
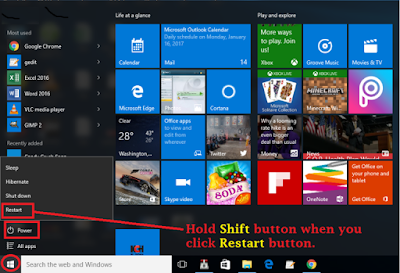
- Step 1: Click on Start menu and Press Shift key then Click on Restart button.
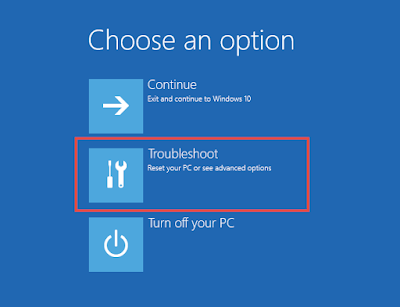
- Step 2: Select on Troubleshoot option.
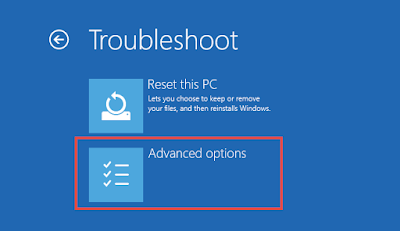
- Step 3: Click on Advanced Options.
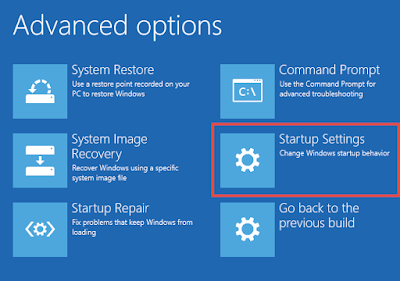
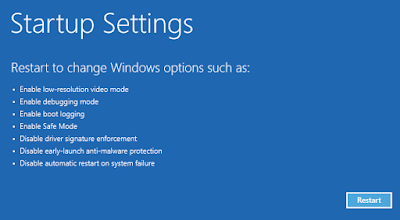
- Step 4: Select Startup Settings option.
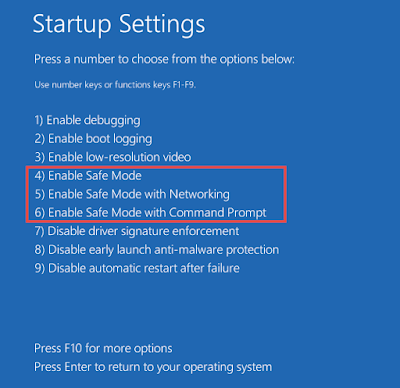
- Step 5: Select Enable Safe Mode option and then Click Restart button.
- Step 6: Press F5 button to Enable the Safe Mode With Networking option.
Guide: 4 Abolish Smart DNS Proxy Related Files From Task Manager
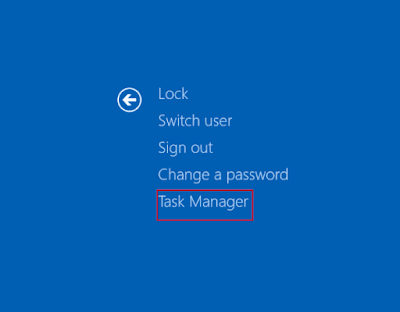
- Step 1: Press ALT+Ctrl_Del Button From the key board simultaneously.

- Step 2: Select Windows Task Manager Option from Windows screen.
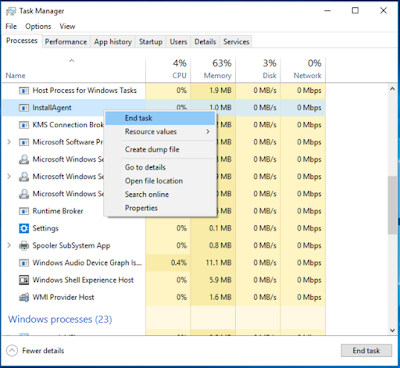
- Step 3: Choose the malicious process and click on End Task Button.
Remove Smart DNS Proxy From Mozilla Firefox Browser
- Step 1: Launch Mozilla Firefox and click on Menu icon (≡).
- Step 2: Now Click on Add-ons from the open Window.
- Step 3: In the Add-ons Manager tab and choose the Extension or Appearance Panel.
- Step 3: Select Smart DNS Proxy and other suspicious extensions and click on Remove button.

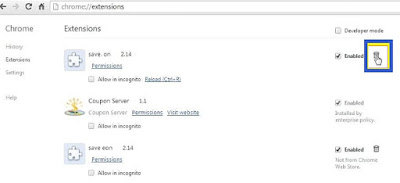
Remove Smart DNS Proxy From Google Chrome Browser
- Step 1: Launch Chrome browser and click on Settings icon (≡).
- Step 2: Click on Tools option and select Extensions.
- Step 3: From the opened Extension Window you need to locate Smart DNS Proxy if found then click on the garbage bin icon appear on right of it.
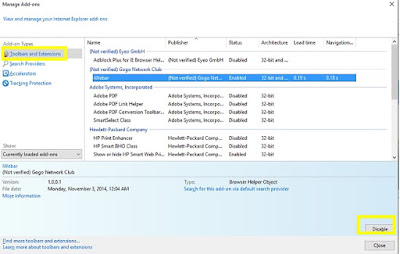
Remove Smart DNS Proxy From Internet Explorer Browser
- Step 1: Launch Internet Explorer and Press Alt+T button or Click on (≡) from right top corner.
- Step 2: Select Tools option and click Manage Add-ons option later choose Toolbars and Extension tab.
- Step 3: Select Smart DNS Proxy and other malicious add-ons and select Disable button.
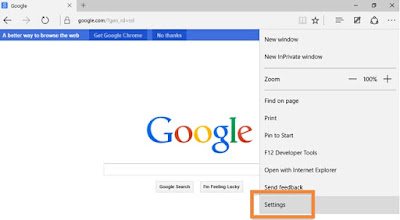
Remove Smart DNS Proxy From Microsoft Edge Browser
- Step 1: Launch Microsoft Edge web browser and Click on More(....) icon.
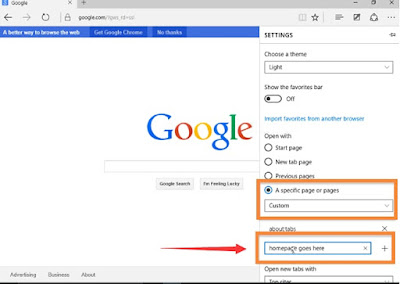
- Step 2: Choose Settings and select a specific page or pages from under the Open option.
- Step 3: Select Custom option and enter the URL of the page that you wish set as your browser homepage.
No comments:
Post a Comment